
Deploying React App Using Serverless and Terraform on AWS
Serverless framework
Serverless framework is a neat tool to develop and deploy serverless applications very easily. To define how easy it is, when you create a single lambda function, configure it in serverless.yml (core serverless framework configuration) and deploy it, Serverless will generate the corresponding cloud formation template with all the required resources in it. For example: API Gateway, S3 bucket and Cloudwatch groups, among others. A simple tutorial can be found here. Note: serverless cloud is something different.
Terraform
As many of you already know, Terraform is an Infrastructure as Code (IaC) tool that allows you to create and manage infrastructure across multiple cloud providers very efficiently. In this article, I will be using Terraform configuration to create AWS resources via Terraform cloud.
How it works
Using serverless CLI, it is very easy to deploy into AWS.

If you are deploying from a local machine, you need to configure AWS access credentials in your command shell. If you are deploying from Gitlab or Github or any other pipelines, you need to provide AWS credentials via environment variables. Doing this:
- Gives you access to many services in AWS (more than what is required)
- Doesn’t give you fine control over naming conventions, role policies, etc.
- Combines application and infrastructure context. Infrastructure is also iterated on every application release
- and many more
All these are sufficient if you are in experimenting or development mode. When you are moving to production, it is wise to use Terraform to bootstrap infrastructure and keep Serverless app-specific.
The requirements you need to know about
Serverless has to be application-specific and Terraform has to be infrastructure-specific.
I am going to take an example serverless app, make changes to it to deploy and create the required Terraform configuration for infrastructure.
1. Prerequisites
- Choose a region (Ex: eu-west-1)
- Create a connection for Github in Developer Tools and copy the ARN
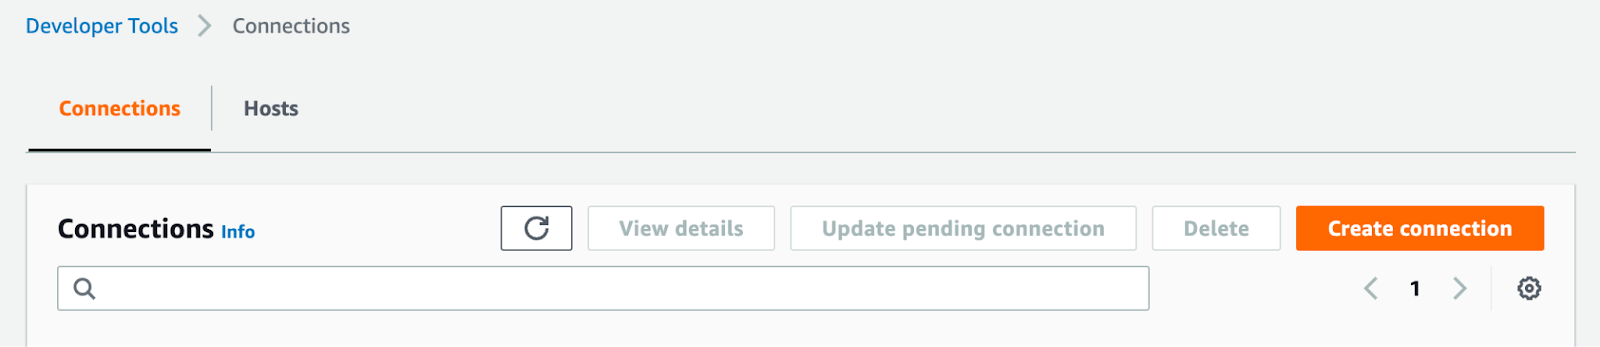
- Create a new IAM User, create an Access key and Secret key
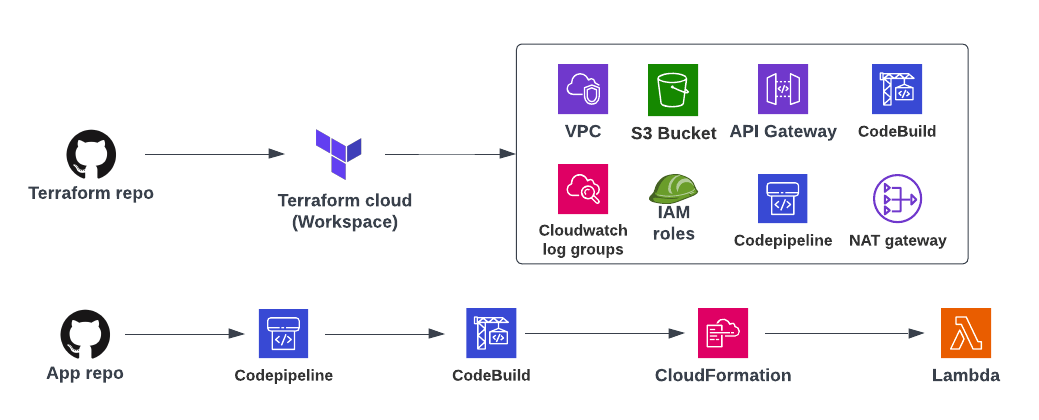
2. Terraform configuration
Here is my repository containing Terraform code
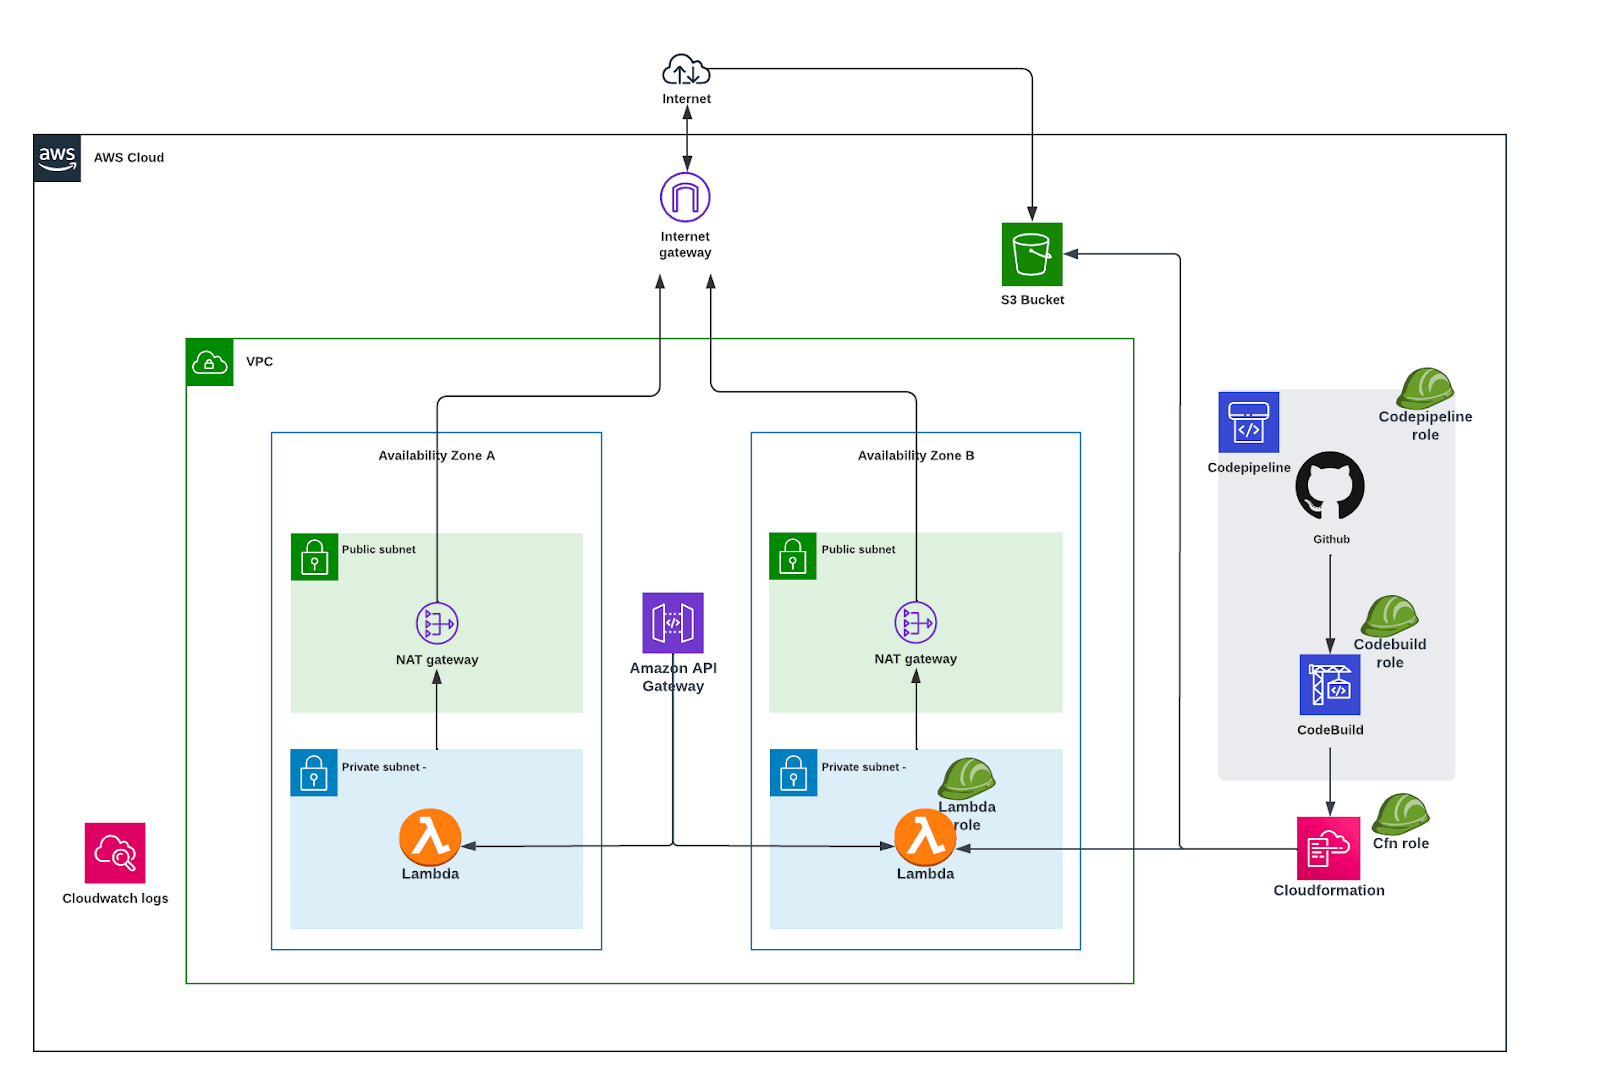
It will create the below AWS resources except for Lambda and Cloudformation (which will be created during the deployment of the application).
3. Terraform cloud
- Create an account at https://app.terraform.io/
- Create a new Workspace → Choose “Version control workflow”
- Connect to VCS → Choose Github, and complete the setup process

- Choose a repository → Configure settings (Workspace name)
- Open the workspace and set the following variables
codestar_connection_arn
 source_repository_id (Example: username/repo_name)
AWS_SECRET_ACCESS_KEY (Environment, sensitive)
AWS_ACCESS_KEY_ID (Environment)
stage = dev
identifier = dev
region = eu-west-1
vpc_cidr = 10.0.0.0/16
account_number- Now you are ready to create AWS resources. Once you make a new push to terraform repository, Terraform cloud workspace will automatically make a “Plan” run. You confirm the plan to “Apply” the configuration. Otherwise, you can manually trigger “Plan” via the UI
4. Serverless app
- Create a new fork from the repository mentioned above. It will be easy to create a branch and test the changes
- Create a new branch “aws” (it can be your choice. But make sure you give the same branch name in corresponding Terraform configuration) off “typescript”
- Change “serverless.yml”. All environment variables are passed via Codebuild.
- Change the service name (Please note, if you give another name, you need to change in Terraform configuration also)

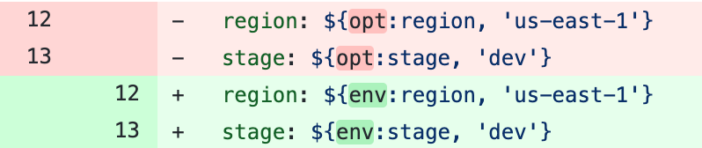
- Change the variables to use environment variables instead of CLI options for region and stage
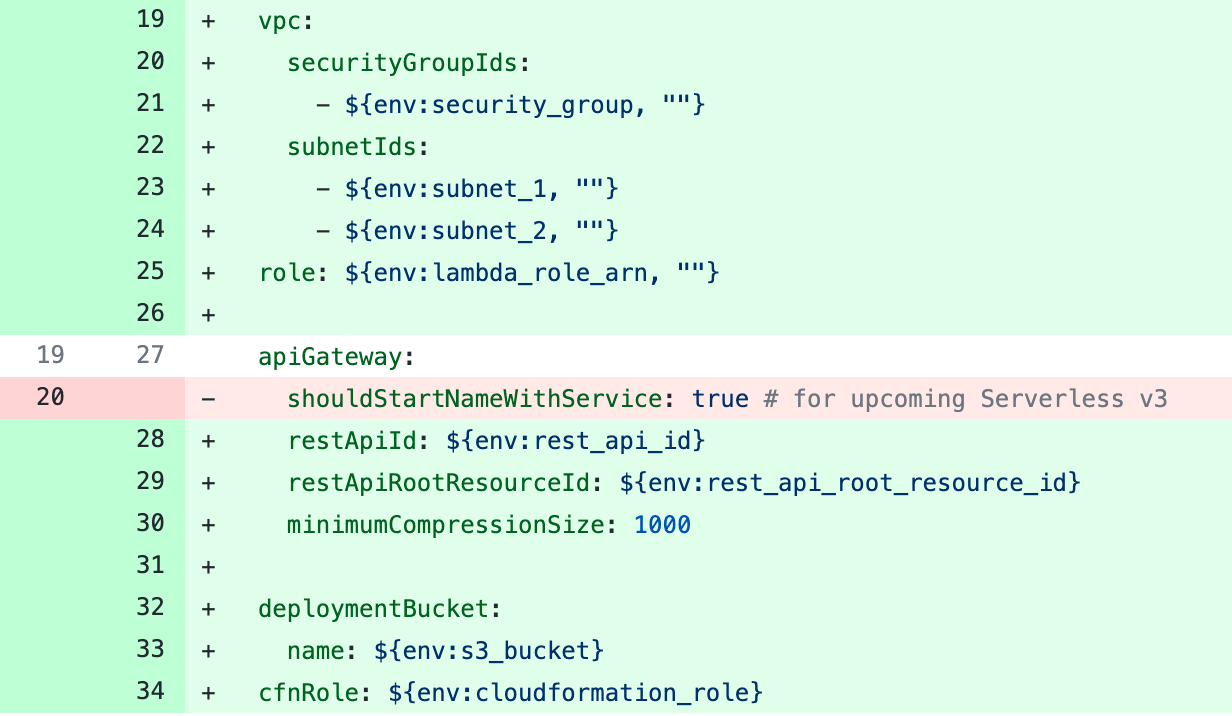
- Add vpc block, role (lambda execution role), deploymentBucket, cfnRole, and change apiGateway config
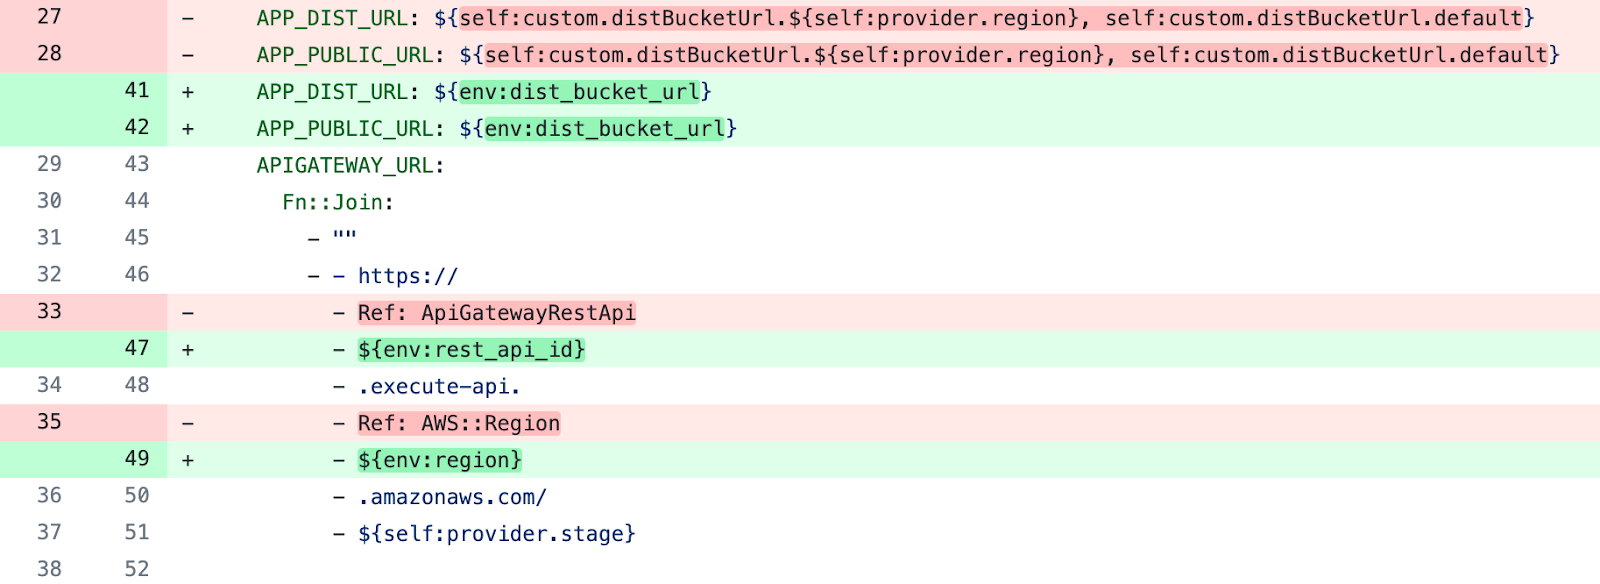
- Change APP_DIST_URL, APP_PUBLIC_URL, and parts of APIGATEWAY_URL to use environment variables
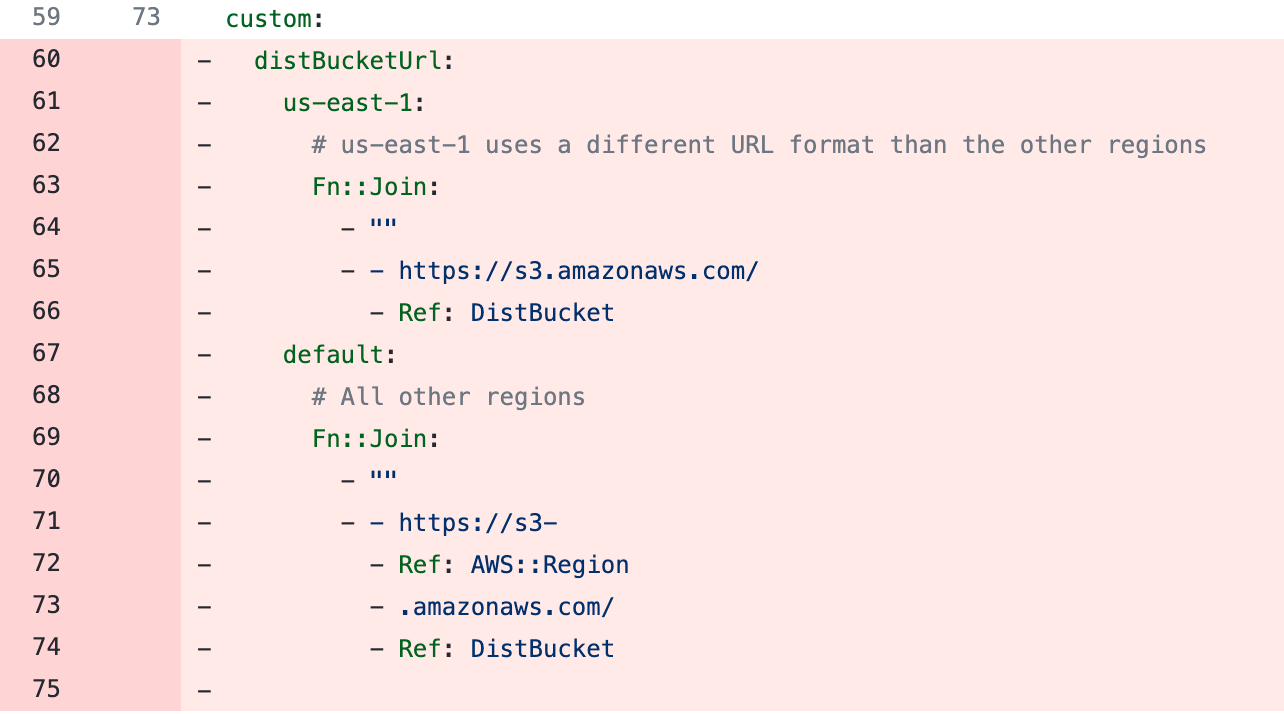
- Remove distBucketUrl from the custom block
- Change the bucket ref to use an environment variable

- Remove the full “resources” block (from line 105 to 143)
- Add “buildspec.yml” required for AWS Codebuild.
version: 0.2

phases:
  install:
    runtime-versions:
      docker: latest
    commands:
      - apt update
      - curl -O https://bootstrap.pypa.io/get-pip.py
      - python get-pip.py --user
      - pip3 install awscli --upgrade --user
  build:
    commands:
      - export PATH=/root/.local/bin:$PATH
      - npm install
      - npx sls deploy
For reference: take a look at my repo/branch
5. Deploy
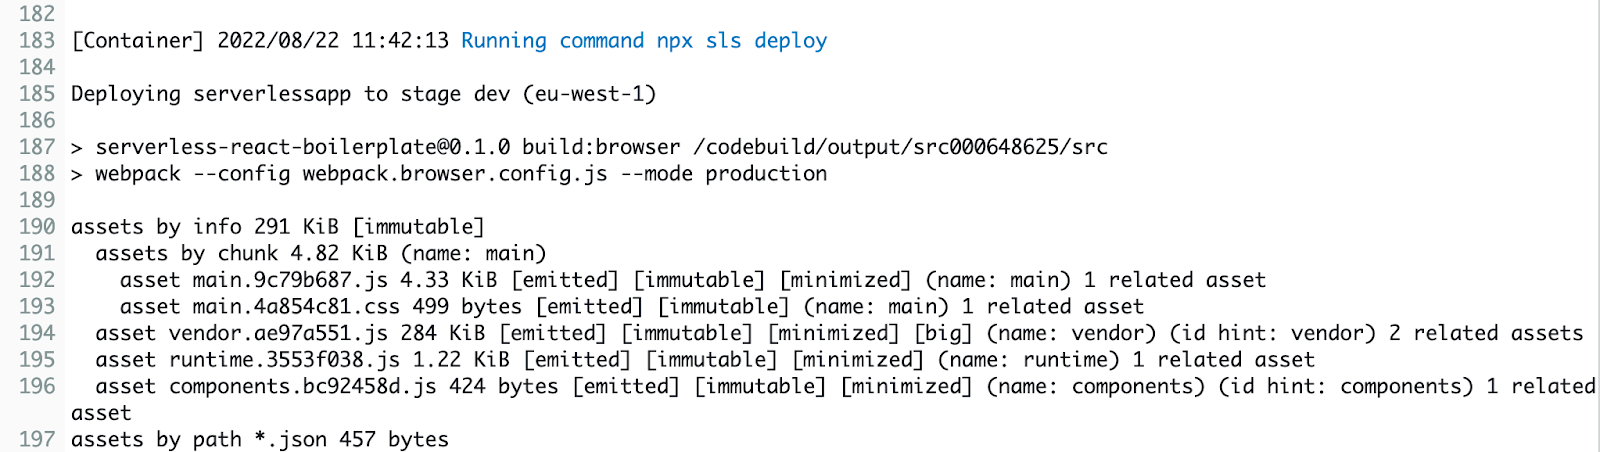
- Push the new changes to the app repo. It will automatically trigger the Codepipeline
(Codebuild logs showing serverless deployed successfully)
- Serverless deploys the Cloudformation stack
Final thoughts
This article gives merely an overview of the infrastructure-specific and application-specific approach for the serverless framework, as well as an example implementation of it. This approach gives developers full control over function deployments. This can be iterated to integrate many services like a custom domain(s) for API gateway, Cloudfront, X-ray, etc, and can be scalable to any complexity. Additionally, Serverless offers an offline plugin to test the API and functions locally just like a real API gateway and lambdas.
Happy coding!
Get in Touch.
Let’s discuss how we can help with your cloud journey. Our experts are standing by to talk about your migration, modernisation, development and skills challenges.
