
How to Re-encrypt EBS Volumes… the Lazy Way
Welcome to the first post in our blog series about the different kinds of automation for AWS. Today, I will cover the re-encryption of EBS volumes.
I choose a lazy person to do a hard job. Because a lazy person will find an easy way to do it.
- Bill Gates
For any security-aware enterprise (and not just enterprises, by the way), encryption is a must. With AWS, it’s easy to encrypt different kinds of resources. This post is all about EBS encryption. You can refresh your memory or read more about EBS encryption here. All caught up? Let’s get into it.
Encryption Using AWS Managed Key
A lot of users who begin using AWS end up using the AWS managed key. Why? There’s a number of reasons:
- They are created and managed (and even rotated!) by AWS.
- They are easy to use: whenever you start using one of AWS services, AWS creates the key for you
- There is no monthly fee
- They don’t count against resource quotas
However, as always, there’s some downsides:
- You cannot manage these keys
- You cannot rotate them at will
- You cannot change their policies
- You cannot use keys in cryptographic operations directly
Automation in AWS: What are your Options?
Let me walk you through a real example. Recently, I had to perform an internal migration within AWS: a client wanted to separate applications and their resources from a single AWS account to multiple per-application AWS accounts.
There are a number of ways to perform such a task and the client was happy to opt for the simplest one: if you have a non-native cloud application that runs on a number of EC2 instances, you could create an AMI, share this AMI with a target account and launch a new instance.
An AMI is an image that provides information required to launch an instance and includes:
- One or more EBS snapshots
- Launch permissions that controls which AWS accounts can use the AMI to launch instances
- A block device mapping that specifies the volumes to attach to the instance when it’s launched
One more downside to AWS managed keys quickly became apparent: you cannot share a snapshot encrypted with AWS managed key with another AWS account.
And guess what? Most of the EBS volumes in the source account were encrypted with the default AWS key. Hence, I couldn’t just create an AMI. I had to re-encrypt (or change the key) the volumes with a customer-managed AWS key and then proceed with the AMI creation process.
The well-known way of changing the key or re-encrypting the volumes is described here. It’s an easy task with three steps:
- Create snapshot
- Create a new volume and specify AWS Key
- Replace old volume with a new one
A lot of people would choose this way: if you have a handful of EC2 instances with a couple of volumes, you could just use the console. The complexity increases with the number of EC2 instances, and even further if the instances have more volumes.
That is what I was dealing with: multiple instances with 6+ EBS volumes each. Additionally, some volumes were gp2 and we wanted to migrate them to gp3 for better performance and to save costs.
Using AWS Tools for Powershell in Migrations
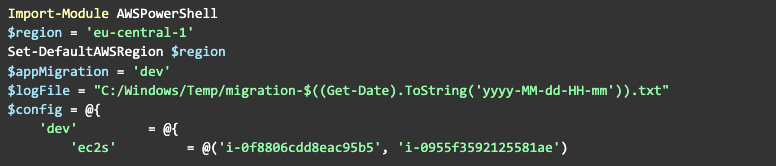
Considering these factors, I decided to use AWS Tools for Powershell in order to help with the migration. Now we’re getting to the fun part, and I’m going to walk you through it step by step.
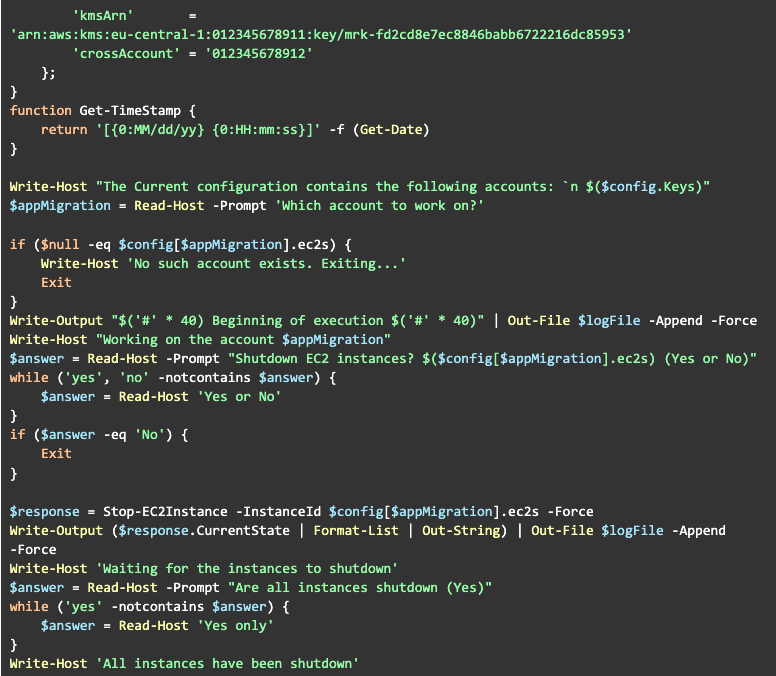
First, since the client had agreed to a downtime, we’re going to shutdown the instance:

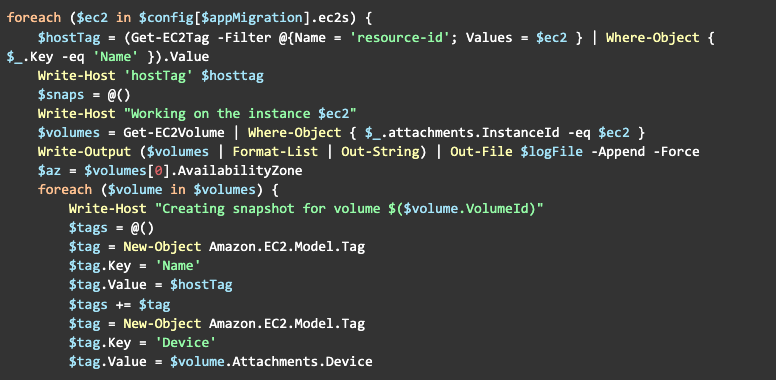
We would query the instance for its volumes:

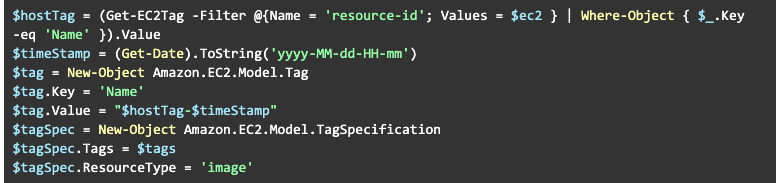
You may spot a small challenge: how can you identify all these volumes and snapshots? But the answer is easy - tags! We can add any information we want as tags. Such as the hostname:

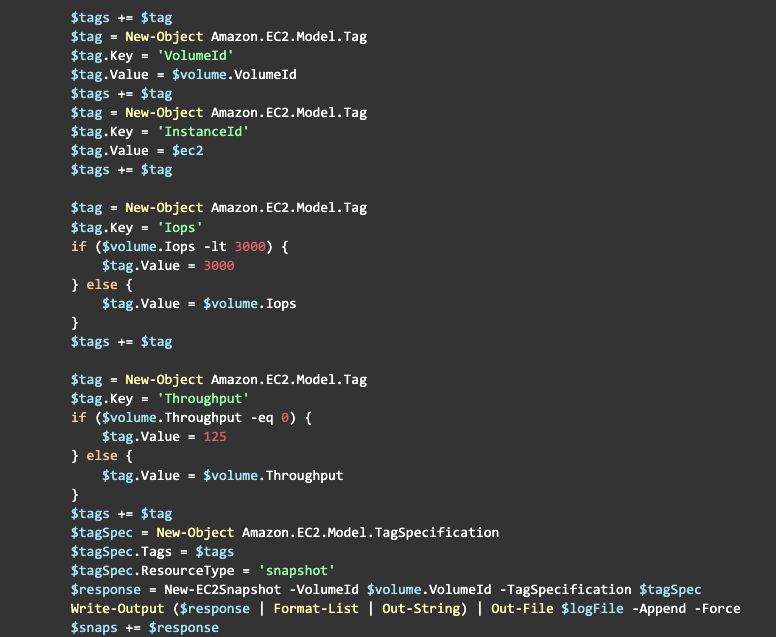
So, now we would create an array of tags that we want to attach to our snapshot:

I have decided to add the following information as tags:
- Name (always good to have one)
- Device: useful for auto-attaching to the instance
- VolumeId
- InstanceId
- Iops
- Throughput
The last 2 were important for 2 reasons:
- Gp2 to gp3 migration
- Custom Iops/Throughput settings
Side note
I ran into an issue if I didn’t re-create the $tag variable via New-Object Amazon.EC2.Model. Tag the key name doesn’t get updated. It shouldn’t happen but it did, hence the re-creation of the variable.
It’s great that we have an array of tags that we can use, however AWS is not using Tag object but rather TagSpecification object, so we want to create one:

Now we are ready to create a snapshot:

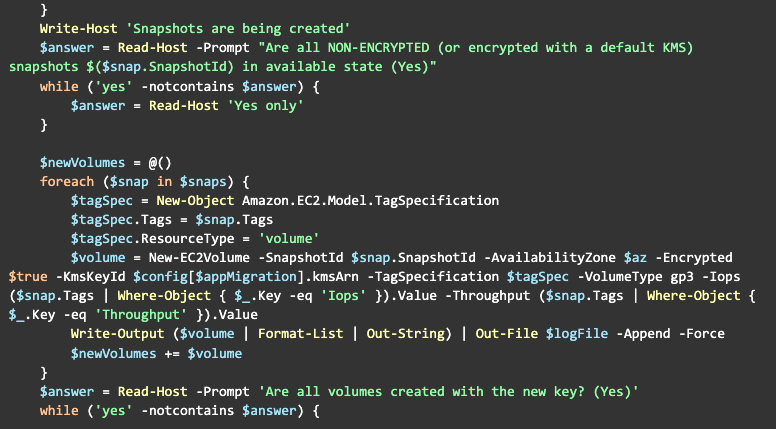
Once the snapshot is ready, we can create a volume with our custom KMS key:

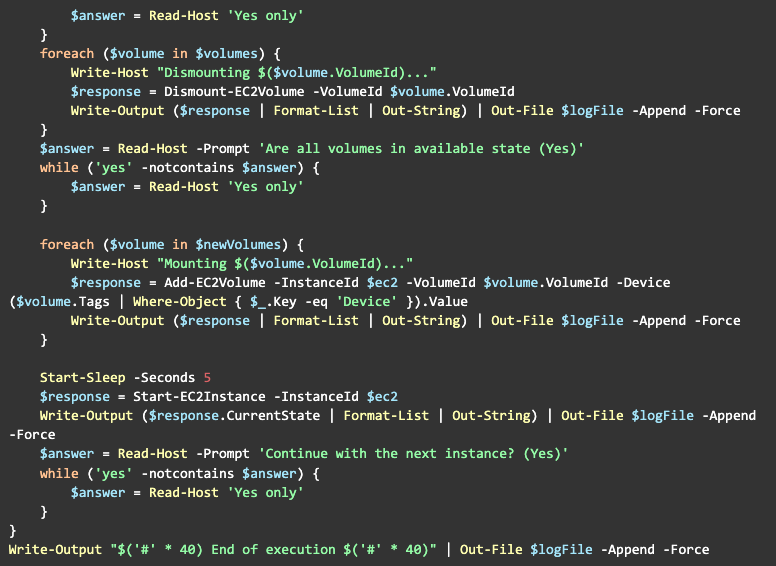
Now, we are ready to proceed with replacing the volume:

Quick Tip #1
We are almost ready to create an AMI and share it with a destination account but there’s a small caveat - in order to create an AMI, AWS has to create a snapshot of new volumes. That process can be rather long (hours and hours on the newly created volumes). If your downtime permits it, then it’s ok. However, often for clients the downtime has to be very brief. That’s why we’ve used a two-stage approach:
First Stage:
- Re-encrypt and replace volumes
Second Stage:
- Let the machine run in the old account
- Let the backup solution create snapshots of new volumes
- Create AMI and share it with the destination account
Quick Tip #2
Beware of special instances (like r5b)! You will not be able to launch the instance with a newly created root volume. I will return to this topic in the next post in this series.
So, now let’s get back to our instance with new volumes and start it:

At this point, some time has passed. Once we have one or more snapshots of our volumes, we are ready for the final step of the migration: AMI creation.
So, shutdown EC2 instance as shown above. Create the necessary tags:
Create the AMI:

Once the AMI is created we can share it with a destination account:

And now you can launch the new instance from it via any number of tools (CloudFormation, Terraform, CLI or AWS Console)
Here’s a complete version of the pre-migration script:
Final Thoughts
As you can see, with the simple automation, we made our life easier and less error prone. It also executes much faster than the manual process.
The script can be enhanced in a number of ways (e.g. instead of the manual input, an automated status check), but this is a topic for another day.
In the next article I will explain a few tricks for how to deal with special EBS-optimised instances like r5b. Stay tuned!
Resources:


Get in Touch.
Let’s discuss how we can help with your cloud journey. Our experts are standing by to talk about your migration, modernisation, development and skills challenges.
